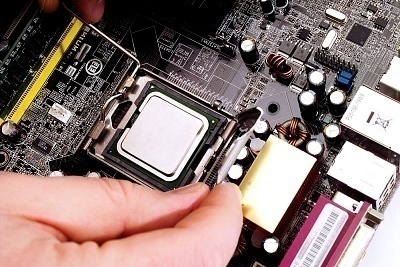
How to Install a Motherboard
A motherboard installation can be completed with just a few easy steps, as outlined below.
Preparing to Install a Motherboard
Grounding is important for all computer installations. Whenever you’re working with the inside of a computer, making sure that you’re properly grounded.
- “Grounding” means maintaining contact with a large, properly grounded metallic surface, either through a special grounding bracelet or with direct hand contact.
Grounding prevents the build-up of a static electric charge in your body, which can damage computer components if it discharged onto their circuit boards.
You also need to make sure your case, CPU, power supply, and motherboard are compatible.
- Check with your motherboard manufacturer, your CPU manufacturer, and the company that supplied the case in which you’ll be installing your motherboard.

There are different types of motherboards, ATX Form Factor, Micro ATX, BTX, and others. Each motherboard type has different power requirements and case shapes, so check online and in your documentation to make sure that your parts are compatible.
Steps to Installing a Motherboard
1. You’ll need to find the screws that came with the case. You should also find the risers that came with the case, which will hold the motherboard away from the case.
- These risers prevent contact or any short-circuiting of the motherboard.
Find a diagram in your case’s documentation of where the screws go, and line them up with the motherboard’s screw holes.
2. Remove the generic in-and-out panel from the back of the case. Push gently on the edges of the panel from the outside of the case until it releases.
Once you’ve removed the generic panel, you’ll need to insert the in-and-out panel that came with your motherboard.
- You may have to remove or bend part of the input panel plate if it covers the connectors on the motherboard. You also need to bend away any metal tabs on the back of the plate, so they don’t scrape on or push the motherboard.
3. Tighten all the screws to make sure the motherboard is grounded properly.
4. Install the CPU, following these directions.
5. Locate your motherboard’s manual, and use the page that shows how to wire the front panel connectors.
Using the manual’s diagram, follow the directions below to install the connectors. The cables should slide very easily onto the protruding metal spokes of the motherboard.
- First install the power cable, then the reset switch.
- Plug in the speaker cable, which will enable your case to emit a POST beep to let you know if your computer is not booting correctly.
- Next to where you plugged in the speaker cable should be a place to plug in the LED cable. Connect the LED cable.
- Other front panel connectors that will need to be attached include the audio input/output, the USB, and the FireWire (also called 1394).
6. After plugging in the case cables, you’ll also need to identify the cables that go to your hard drive.
For older motherboards and hardware, these will be IDE cables. For newer models, these will be SATA cables. Plug in your hard drive to your motherboard in the primary (and master) slot, which can be found according to the documentation.
7. You’re ready to take the biggest step, which is plugging in your power supply.
The power supply cable will include a large cable that plugs in directly to your motherboard, and sometimes a smaller cable that will go to your processor.
8. After your CPU, hard drive, and power supply have been installed to your motherboard, it should be ready to turn on.
Plug in your monitor, power cables, a keyboard, and a mouse. Press the power switch on the front of your case, and verify that the installation has been completed successfully.


Comments - No Responses to “How to Install a Motherboard”
Sorry but comments are closed at this time.