How to Mount an ISO
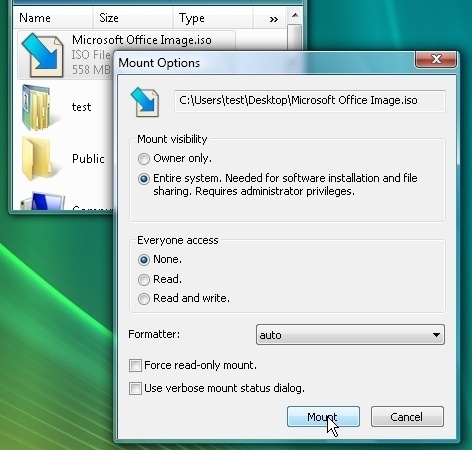
An ISO file is an image that contains all the data files and file system metadata (i.e. boot code, structures, and attributes) of a CD/DVD. In order to mount an ISO image, a disk image emulator that will allow the content of a CD/DVD to be read from an ISO image via a virtual drive is needed. Depending on the Operating System being used, the user can open built-in disk image emulators or download and install free software from the Internet.
How to Mount an ISO Image under Microsoft Windows
Windows OS users can download and install free disk image mounting programs like Daemon Tools Lite, the non-commercial version of Daemon Tools Pro Standard. It has a graphical user interface (GUI) and command-line interface. It can support up to 4 virtual SCSI CD/DVD devices and can bypass copy protection schemes like SafeDisc and SecuROM.

To mount an ISO image using Daemon Tools, take the steps listed below:
- After installation, right click the Daemon Tools icon (lightning bolt) located in the system tray.
- Point the mouse to the Virtual CD/DVD-ROM menu. The Set number of devices sub-menu will appear. Choose the number of virtual drives wanted.
- Right click the icon then point to the Virtual CD/DVD-ROM menu. A new sub-menu will appear. This is the virtual drive (Device 0: [Letter:] No media). Point the mouse to the virtual drive then click Mount Image.
- Finally, choose the desired ISO image to be mounted (To unmount: click the Unmount all drives option under the Virtual CD/DVD-ROM menu).
Another free software that Alcohol Soft created is Alcohol 120%. It can support Media Descriptor Image (.mds/.mdf) disc image formats aside from the usual disk image files like .iso, .ccd, .img, .sub, etc. It bypasses the same protection schemes as Daemon Tools with the addition of Data Position Measurement (DPM), which protects CDs against duplication by detecting small differences in the positions of the data in the disk.
To use Alcohol 120% to mount an ISO image, take the steps listed below:
- Right click the icon that appears in the system tray after installation. A list of available virtual drives will appear under Easy Mounting Menu.
- Select the desired drive, choose the ISO image to be mounted, then open it.
Other free programs that can be downloaded and used to mount disk images are WinZip 12 Pro (Free Trial), WinRAR (convert .iso to .rar and vice versa), WinISO, and ISOBuster (for CD/DVD data recovery).
How to Mount an ISO Image under Linux
For Linux OS users, the “mount” command line utility instructs the Operating System that a file system is ready to be used. Linux, in turn, associates the file with a particular point in the file system hierarchy (i.e. mount point).
To mount an image directly from a Linux OS, take the steps listed below:
- Log in or use the “[$su -]” command to switch to root user.
- Use “[# mkdir -p /mnt/disk]” command to create a mount point.
- Mount the image using the command “[# mount -o loop imagefile.iso
/mnt/disk]”.
- Change directory to list it using “[# cd /mnt/disk] and [# ls -l]”.
There are also free Linux compatible software made for disk image mounting tasks like Acetone ISO, which allows users to mount and manage image files. It supports ISO, MDF, NRG, BIN, and DAA disk image formats.
How to Mount an ISO Image under MacOS
Mac OS users can accessthe Disk Utility program from the Mac OS X command line with the “diskutil” and “hdiutil” commands. Dis Utility can create, convert, compress, encrypt, and mount CD images like .dmg and .cdr. Another built in disk image emulation program for Mac OS X is the DiskImage Mounter, which is found in /System/Library/CoreServices.


Comments - 2 Responses to “How to Mount an ISO”
Sorry but comments are closed at this time.