APIPA
Automatic Private IP Addressing (APIPA) Overview
DHCP is a service that functions at the application layer of the TCP/IP protocol stack. One of the primary tasks of the DHCP service is to automatically assign IP addresses to DHCP clients. A server running the DHCP service is called a DHCP server. The DHCP service automates the configuration of TCP/IP clients because IP addressing occurs through the system. The DHCP server assigns IP addresses from a predetermined IP address range(s), called a scope. To summarize, the DHCP server dynamically assigns IP addresses to DHCP clients, and also allocates TCP/IP configuration information to DHCP clients, such as DNS server IP address and WINS server IP address.
To uniquely identify computers on a TCP/IP based network, each computer must have a unique IP address. To communicate on the Internet and private TCP/IP network, all hosts defined on the network must have IP addresses. When the DHCP client boots up on the network, a negotiation process called the DHCP lease process occurs between the DHCP server and client. During the DHCP lease process, IP address and any additional TCP/IP configuration parameters are provided to DHCP clients by the DHCP server. Prior to the Automatic Private IP Addressing (APIPA) feature, a DHCP client received no notification if the DHCP lease process was unsuccessful in allocating an IP address to a DHCP client. The client was also not able to configure its own IP address if it could not obtain an IP address because the DHCP server was unavailable.
With the introduction of Automatic Private IP Addressing (APIPA) feature, a DHCP client that cannot obtain an IP address from a DHCP server is able to configure its own IP address.
How APIPA works
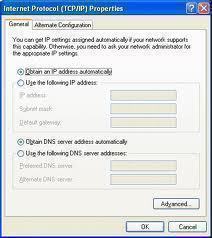
- A client is configured to automatically obtain an IP address from the DHCP server.
- The client is however unable to contact the DHCP server for dynamic IP address assignment because the DHCP server is unavailable.
- The client computer uses the APIPA feature to assign and configure its own private IP address.
- The IP address which the client assigns to itself is a private IP address in the address range of 169.254.0.0 to 169.254.255.255. This address range is reserved by Internet Assigned Numbers Authority (IANA).
- The client continues to check whether the DHCP server is available at 5 minute intervals.
- When the DHCP is available again, the client that assigned itself an IP address through APIPA initiates the DHCP lease process to request and obtain an IP address from the DHCP server.
- When the DHCP server assigns an IP address to the client, the client replaces the APIPA address with the one it obtained from the DHCP server.
APIPA addresses are invalid on the Internet, and computers that are using APIPA addresses can only communicate with other computers using APIPA addresses on the same network segment.
The APIPA feature configures the client with the following:
- IP address
- Subnet mask
The APIPA feature cannot configure the client with any other TCP/IP configuration:
- Default gateway
- DNS server IP address
- WINS server IP address
You have to use an alternate configuration to provide the above TCP/IP configuration information to a client when no DHCP server is available for the client.
APIPA is supported in the following Microsoft Windows operating systems:
- Windows 98
- Windows Millennium Edition (Me)
- Windows 2000
- Windows XP
- Windows Server 2003
How to check whether APIPA is enabled
- At a command prompt, enter ipconfig /all to view IP address information.
- Verify that Autoconfiguration Enabled is displayed with Yes.
- Verify that the IP address is within the address range of 169.254.0.0 to 169.254.255.255.
How to disable APIPA
You can disable the APIPA feature for only one adapter, or you can disable APIPA for all adapters. The APIPA feature is disabled by editing certain Registry keys in the Windows Registry.
How to disable APIPA on one adapter
- Open the Registry Editor.
- In the HKLMSystemCurrentControlSetServicesTcpipParametersInterfaceAdapterKey subkey, add the IPAutoconfigurationEnabled entry with a value of 0.
- Restart the computer.
How to disable APIPA for all adapters
- Open the Registry Editor.
- In the HKEY_LOCAL_MACHINESYSTEMCurrentControlSetServicesTcpipParameters subkey, set the IPAutoconfigurationEnabled entry with a value of 0.
- Restart the computer.


Comments - One Response to “APIPA”
Sorry but comments are closed at this time.