How to Setup a Remote Desktop Web Connection
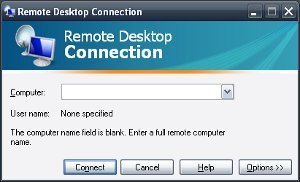
The Remote Desktop Web Connection is a Win32-based ActiveX control (COM object) that can be used to run Remote Desktop sessions from within a browser like Internet Explorer. It is a useful alternative to the regular Remote Desktop because it can be used without installing any software on the client machine. Remote Desktop demands the user to install software on the client’s machine, which can be sometimes infeasible.
Remote Desktop Web Connection is able to do this because the Remote Desktop runs within a web browser such as Internet Explorer. The web browser on the host computer must support Active-X controls to implement Remote Desktop Web Connection.
Configuring the Host Computer
Enabling the Remote Desktop Web Connection on the host computer is the foremost step. Follow the steps listed below carefully:
- Open Control Panel, click on the Add or Remove Programs icon, and then click on Add/Remove Windows Components option.
- Click on Internet Information Services, and then click on the Details option.
- In the Subcomponents of Internet Information Services list, click on World Wide Web Service, and then click on the Details option.
- In the Subcomponents of World Wide Web Service list, select the Remote Desktop Web Connection check box, and then click OK.
- In the Windows Components Wizard, click on Next.
- Click Finish when the wizard has completed.
Configuring IIS (Internet Information Services)
TCP port number 80 acts as the default port number to identify Internet Information Services (IIS). In order to avoid external harmful attacks, these steps change the default port number. The steps listed below are optional but implementing them will highly improve your machine’s security.
Note: TCP port number should not be changed if you are already using the machine as a web server.
- Open Control Panel, click on the Performance and Maintenance icon, and then click on Administrative Tools. Double-click on the Internet Information Services.
- In the ISS snap-in, expand your computer name, expand Web Sites, right-click on the Default Web Site, and then click on Properties.
- On the Web Site tab, change the TCP Port value. Enter a number between 1000 and 65535 that you remember well. This port number will be used for future connections.
- Click OK, and close the Internet Information Services snap-in.
Configuring Remote Desktop
A user account with a password is necessary to connect using Remote Desktop. Create an account if you do not have one. Follow the listed steps carefully to activate Remote Desktop
- Right-click on My Computer from the desktop, and select the Properties option.
- Select the Remote tab, and then click on the Allow users to connect remotely to this computer check box.
- Click Select Remote Users, and then click Add.
- In the Select Users dialog box, type the name of the user and then click on OK. Click on OK again to return to the System Properties dialog box, and then click on OK to close it.
Connect to the Remote Computer
Finally, you can now connect to the remote configured computer via the Internet. In order to connect, the IP address of the target computer should be known (you could use What Is My IP or What Is My IP.com to identify the IP address). Now, simply follow the listed steps carefully in order to connect:
- Open Internet Explorer browser, and enter the URL http://ipaddress:port/tsweb/
Example: http://192.168.1.120:1374/tsweb/ - Your browser may not be installed with the Remote Desktop ActiveX control, hence if it prompts you to install it, click Yes.
- On the Remote Desktop Web Connection page, click on Connect. You don’t need to fill in the Server field. If you leave the Size field set to Full-screen, the remote desktop will take over your local desktop.
- Enter your user name and password at the Windows logon prompt, and then click OK. You’ll see your desktop completely.


Comments - 4 Responses to “How to Setup a Remote Desktop Web Connection”
Sorry but comments are closed at this time.