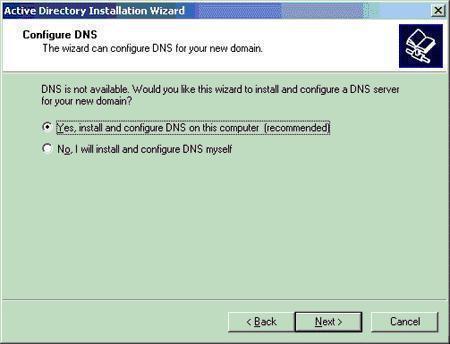
How to Setup a Windows DNS Server
A Domain Name Server (DNS) is a computer that uses networking software in order to save a database of network IP addresses and domain names for other Internet hosts. A DNS helps client computers use the web more efficiently by storing previous address look-ups, which allows them to surf the Internet faster. Older Windows Servers used the Windows Internet Name Service (WINS) for name resolution on the local network. It is recommended that a DNS Server be installed with the Windows 2008 server in order to provide a higher quality of service for the network’s client computers.
How to Install a Windows DNS Server
Step 1 – Select “Start” and “Control Panel,” then choose “Administrative Tools” and “Server Manager.”
Step 2 – Expand then select “Roles,” then choose the “Add Roles” menu option.
Step 3 – Click “DNS Role” then “Install to DNS in Windows Server 2008.”
Configure the Windows 2008 Server to the DNS Server
Step 1 – Choose “DNS” in the “Administrative Tools” folder in order to open the server’s DNS console.
Step 2 – Select the computer name and then choose “Action, Configure a DNS Server…” to open the Windows Configure DNS Server program wizard.
Step 3 – Click “Next” then select to configure the “Forward and reverse lookup zone, root hints only, and forward lookup zone,” then click “Next.”
Step 4 – Click “Yes” to make a forward loopup zone, then choose the subsequently displayed radio button to install the Zone Type to be configured on the server.
Step 5 – Click “Next” and enter a name to label the DNS zone being created on the server.
Step 6 – Click “Next” then “Yes” in order to make a “reverse lookup zone,” then enter the name to label the new entry.
Step 7 – Choose between Ipv4 or Ipv6 “Reverse Lookup” then click “Next.”
Step 8 – Enter identifying information for the new zone, then determine if a DNS file will be created or if there’s an older one for the server to use. If uncertain, select the option for a new file to be created.
Step 9 – Determine whether the server should take secure, nonsecure, or dynamic updates, then click “Finish.”
How to Create a Name Server
Step 1 – Choose “DNS” from the “Administrative Tools” menu folder in order to open the DNS Server console.
Step 2 – Open “Forward Lookup Zone,” right-click the domain, and select “Properties.”
Step 3– Click “Name Servers” then “Add.”
Step 4 – Enter the “FQDN” Server name and the server’s IP address to be added as a name server.
How to Create Host A Records
Host (A) records map IP addresses to host names and help identify servers in the forward lookup zone. They help to improve overall query performance and also permit PTR records to be created.
Step 1 – Choose “DNS” from the Administrative tools folder, then expand the “Forward Lookup Zone.” Choose the folder that contains your domain.
Step 2 – Select “New Host” from the “Action” menu, then enter the IP Address and the name of the host being made.
Step 3 – Check the “Create Associated Pointer (PTR) Record” check box to make the PTR record simultaneously.
Step 4 – Click “Add Host” to complete adding the Host A record.
How to Make an MX (Mail Exchange) Record
MX records help identify mail servers that reside within a given zone in the DNS database. The MX record lets you prioritize mail servers and keep track of all used on the network.
Step 1 – Choose “DNS” from the Admin Tools folder.
Step 2 – Open the “Forward Lookup Zone” and select the folder that is your domain.
Step 3 – Choose “New Mail Exchanger” from the “Action” menu and enter the domain or host.
Step 4 – Input the Mail Server Priority and Mail Server, then click “Ok” to complete making an MX record.
How to Make a PTR Record
PTR records are designed to make an entry in the reverse lookup zone to serve reverse queries. If the user did not choose to automatically make a PTR record when he/she created a Host record, he/she may do so anytime after.
Step 1 – Choose “DNS” From the Admin Tools folder, then select the “Reverse Lookup Zone” that you want to make the PTR record.
Step 2 – Select “New Pointer” from the “Action” menu and enter the Host IP number and Name.
Step 3 – Click “Ok” and the PTR record will be created.


Comments - One Response to “How to Setup a Windows DNS Server”
Sorry but comments are closed at this time.