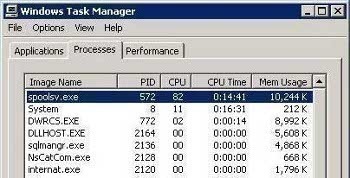
Spoolsv.exe Error
The Spoolsv.exe file is an executable program that runs the printing processes on a computer using the Windows Operating System (OS). The program normally runs in the background on most computers and the user should leave it in this state unless he/she determines that the file is the source of system problems on the computer. If the file is closed, it will display an error that states:
“Spoolsv.exe – Application Error. The memory could not be written. The instruction at “0x77fcc2co” referenced memory at “0x00000000.”
Computer malware infections cause many Spoolsv.exe errors. They require basic troubleshooting in order to return the helper application to a normal operating state.
How to Fix Spoolsv.exe Errors
Step 1 – Press the “F8” key during normal computer restart in order to restart the computer in Windows Safe Mode.
Step 2 – Click “Start,” “Settings,” and “Control Panel.”
Step 3 – Select the “Performance and Maintenance” menu option then click the “Administrative Tools” icon.
Step 4 – Select “Services” then find the “Spooler services” option located in the “Services Management Console.”
Step 5 – Right click the icon and click “Stop.”
Step 6 – Press the “Windows” and “E” keys simultaneously to open Windows Explorer.
Step 7 – Navigate to the “windowsSystem32SpoolPrinters” folder and open it in Windows Explorer.
Step 8 – Delete all files that end in .SPL and >SHD in the folder.
Step 9 – Open the “TMP” folder located under “Printers” and delete all of the files found in the folder.
Step 10 – Restart the Spooler services from the Services Management console that is still open, then restart the computer to finish correcting the Spoolsv.exe application’s problems.
Step 11 – If the Spoolsv.exe error persists, edit the registry to correct the problem. Select “Start” and “Run,” enter “CMD” or “COMMAND” in the search text field, then click “enter” to open the DOS prompt.
Step 12 – Enter “Regedit” at the DOS prompt then press “enter” to load the Windows Registry editor application.
Step 13 – Use the “Search” function in REGEDIT to find the following keys. Right-click each one when found and choose the “Export” menu option to save them to the computer’s hard drive:
HKEY_LOCAL_MACHINESYSTEMControlSet001ControlPrint HKEY_LOCAL_MACHINESYSTEMCurrentControlSetControlPrint
Step 14 – Find the following keys and delete any items found under their entries:
HKEY_LOCAL_MACHINESYSTEMCurrentControlSetControlPrintPrinters
HKEY_LOCAL_MACHINESYSTEMControlSet001ControlPrintEnvironmentsWindowsNT x86DriversVersion2
HKEY_LOCAL_MACHINESYSTEMControlSet001ControlPrintEnvironmentsWindowsNT x86DriversVersion3
HKEY_LOCAL_MACHINESYSTEMCurrentControlSetControlPrintEnvironmentsWindowsNT x86DriversVersion2
HKEY_LOCAL_MACHINESYSTEMCurrentControlSetControlPrintEnvironmentsWindowsNT x86DriversVersion3
HKEY_LOCAL_MACHINESYSTEMControlSet001ControlPrintPrinters
Step 15 – Locate the following registry keys and delete any “non-default” items that are located under the respective registry entries. The default entries are: AppleTalk Printing Devices, BJ Language Monitor, Local Port, PJL Language Monitor, Standard TCP/IP Port, USB Monitor, and the Windows NT Fax Monitor
HKEY_LOCAL_MACHINESYSTEMControlSet001ControlPrintMonitors
HKEY_LOCAL_MACHINESYSTEMCurrentControlSetControlPrintMonitors
Step 16 – Exit REGEDIT and restart the computer to complete correcting the Spoolsv.exe error.


Comments - No Responses to “Spoolsv.exe Error”
Sorry but comments are closed at this time.