How to Configure IIS to Host a Web Page
IIS (Internet Information Services) is an easy to use web server from Microsoft. It is not installed on Windows XP Professional by default. However, it is installed when the user upgrades from Windows NT or Windows 2000 to Windows XP Pro. IIS can be installed as follows:
- Click Start, click Control Panel, and double-click Add/Remove Programs. The Add/Remove Programs application starts.
- In the left column of the Add/Remove Programs dialog box, click Add/Remove Windows Components.
- When the Windows Components Wizard appears, click Next.
- In the Windows Components list, select IIS.
- Click Next and follow the instructions.

inetmgr
Install in Windows 7:
- Click the Start button (or the Windows button) then Control Panel.
- Click Programs and Turn Windows features on or off under Programs and Features.
- In the list that appears, check Internet Information Services and Internet Information Services Hostable Web Core, click OK, and wait for it to install.
IIS allows the user to host a web page on his/her own computer that others using the DNS name or the IP address of the PC on the network can access. The IP address can be found by using the command ipconfig in command prompt.
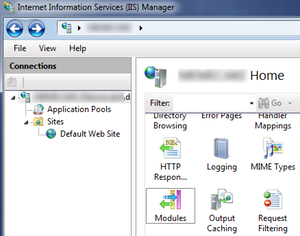
The IIS is configured with the IIS snap-in, previously called the Internet Services Manager. This can be accessed in one of three ways:
Method 1:
- From the Start menu, select Settings then Control Panel
- Open Administrative Tools
- Open Internet Information Services
Method 2:
- Right click My Computer on the desktop
- Select Manage to open the Computer Management console
- Select Internet Information Services under Services and Applications
Method 3:
- From the Start menu, select Run
- Type inetmgr and run the command
The Internet Information Services snap-in provides server management options to control content and access to the Web or FTP sites. For example, if a developer is testing a site before uploading it to an intranet or the Internet, he/she can use this tool to test the settings exactly as they will be on the final server. When the IIS is installed, a default website and FTP site are created. Information can now be published on these default sites by following the steps outlined below:
To Publish Content on a Web Site
- Create a home page for the website with any web page design tool
- Name the home page file Default.htm or Default.asp
- Copy the home page into the default Web publishing directory for IIS, also called the home directory, located in inetpubwwwroot or inetpub/wwwroot on the main partition (usually C:).
- If the network has a name resolution system (typically DNS), then visitors can simply type the user’s computer name in the browser’s address bar to reach user’s site. If the user’s network does not have a name resolution system, visitors must type the computer’s numerical IP address.
To Publish Content on the FTP Site
- Copy or move the files into the default FTP publishing directory. The default directory that Setup provides is inetpubftproot.
- If the user’s network has a name resolution system (typically DNS), visitors can type ftp:// then the computer name in their browser’s address bar to reach the user’s site. If the user’s network does not have a name resolution system, visitors must type ftp:// and the computer’s numerical IP address.
With Windows XP Professional, users can host one website and one FTP site on a single computer. To host multiple web or FTP sites on a single computer, consider upgrading to a server product.


Comments - 25 Responses to “How to Configure IIS to Host a Web Page”
Sorry but comments are closed at this time.