How to Take a Screen Capture
Screen captures are, literally, ‘captures’ of the images on a computer’s screen. This is necessary when one needs troubleshooting help for an unexpected system error, in which case it would help if an image of the error message can be procured and sent to the technical support personnel. It can also be used to capture images embedded in web pages or PDF files.
Taking Screen Captures
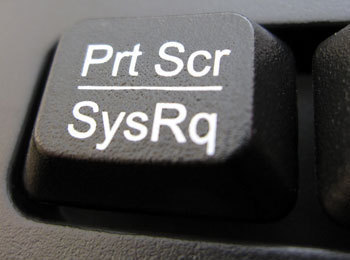
To take screen captures, one has to use the “Print Screen” (or oft-abbreviated ‘PrtSc’ button that is usually found at the upper right portion of the keyboard. In extended keyboards (the ones with a numeric keypad), this button can be found along with other keys – Insert, Delete, Scroll Lock and others.
For a full screen capture, simply press the Print Screen or PrtSc button. This action takes a picture of the whole screen and deposits it in the Windows clipboard for later access and retrieval. This action happens without any confirmation or pop-up window message.
For taking a picture of an active window or error message, check that the window or message is active. Click on the window or message you’re interested in – keeping away from action buttons and the like. Find a blank spot on the message box or window and click on it.
This will bring the message box or window to the foreground. Hold the Alt button down and then press the Print Screen or PrtSc button. This captures that specific image and transfers it to the Windows clipboard. As with a full screen capture, there are no confirmatory windows or messages for the completion of this action.
A slightly more involved process happens if you wish to take a picture of a portion of the screen. Take a full screen capture, and after transferring the image to the Clipboard, open a graphics program and edit the image in it.
Editing and Saving the Images Captured
You need a graphics program like MS Windows Paint or Adobe Photoshop for this step. Once your graphics program is open, simply paste the captured image into the application – either by pressing Ctrl + V or opening the Edit command in the graphics program menu, and clicking on Paste.
Editing the image depends on what you need to do – resize it (enlarge or reduce), crop it (which means removing unwanted or unneeded portions), adjust the colors, etc. Once you’ve edited the picture to your satisfaction, it is simply a matter of saving the image into the right format.
Click the ‘File Save’ or ‘File Save As’ button on the menu bar. When the dialogue box appears, you need to identify where you will place the file (Windows Office XP automatically sets up a ‘My Pictures’ sub-folder in the ‘My Documents’ folder on your hard disk) and decide on a file name. Once this is done, you can easily paste the image into an email, a document or presentation, upload it in a free web space server on the net or use it in your blog.


Comments - No Responses to “How to Take a Screen Capture”
Sorry but comments are closed at this time.