How to Use Powerpoint
What is Powerpoint?
Powerpoint is a powerful program that comes with Microsoft Office. Powerpoint allows users to create animations, presentations, and slideshows for lectures, home movies, meetings, and other purposes. Powerpoint includes a wide variety of tools, features, and special effects that make powerful and entertaining presentations easy to create. With this software, users have the ability to modify virtually every aspect of their presentation, including text options, color schemes, and placement of objects such as videos and pictures. Users also have the ability to create an unlimited number of slides and can import files from their computer, the Internet, or another media source.
Animations
With Powerpoint, users are able to create powerful, high quality animations that behave and flow in any way that the user wishes. Users can begin by drawing characters, objects, and scenes in another program such as Paint, Photoshop, or GIMP. Next, the user should import the images into Powerpoint, ideally having a separate image on each slide. The user can then adjust the speed at which the slides are displayed in order to create a fast, smooth animation. Special effects can be used to make objects move around a scene and even interact with the characters that the user has created.
Presentations
Powerpoint is most frequently used to create presentations for boardroom meetings, school projects, and lectures. By using Powerpoint, the user can add text to a page, insert ClipArt, or insert other items such as pictures, videos, and audio clips. The user can then modify these objects through quick and easy tools such as the highlight feature, color selection tool, and special effects. The user can set how fast the presentation displays slides, drags and drops objects into specific places, and focuses the viewer’s attention on specific aspects of the presentation by customizing each slide to provide the most accurate and entertaining information.
Slideshows
In addition to creating animations and slideshows, Powerpoint is also capable of creating slideshows for digital photo albums, home movies, and personal collections. Slideshows allow users to display their pictures in one place and highlight their favorite moments by organizing them in a smooth fashion. Powerpoint allows users to import pictures as individual slides and control how fast each picture is displayed. The user also has control over transitional effects such as fading, blending, and bumping. Finished slideshows can be saved to the user’s hard drive, emailed as attachments, or uploaded to the user’s website, blog, or social networking profile.
Text Options
Powerpoint includes many different options for controlling how text is presented in animations, presentations, and slideshows. For example, the user can select from over fifty different font styles and over a dozen different font sizes as well as change the font color. Users can also highlight text and use special effects to cause the text to spin, wave, or move around in any other variation.
Background Options
In addition to its text options, Powerpoint also allows the user to change how the background of each slide is displayed. The user can choose from virtually any color for the background color, use pre-built themes provided by Powerpoint, or insert an image of their own and resize it to fit the slide.
Compatibility
Users should note that Powerpoint is a very popular program and is, therefore, highly compatible with a wide variety of both third-party software and online applications. Powerpoint can also share files with other Microsoft Office programs and even interact with features from those programs. For example, users can combine the resources of Microsoft Word and Powerpoint in order to insert tables into slides to create a presentation that displays statistics and other important demographics for a business meeting.
How to Add a Video
Adding video to a Powerpoint is a straight forward process; however, it is one that should be done judiciously. Video can quickly backfire because they can turn a presentation into a series of videos rather than an actual presentation. Adding the video first requires that it be in a format that works. For the most part, any video that is added to a slide through the Clip Organizer is in .avi format. However, if the video is added from a file instead, the format might be anything else.
Adding Video From the Clip Organizer

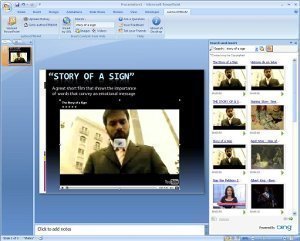
While on the slide that you want to insert a video, click the Insert button at the top of the Powerpoint program. Then click the Movies and Sounds tab. Finally, click the Movie From Clip Organizer. What this does is open up an entire collection of videos, both stored within the program, as well as any that you have added to the Clip Organizer. It’ll also provide you with the opportunity to add videos on your computer to the Clip Organizer so that it is easier to add video in the future.
Adding Video From a File
Similar to the Clip Organizer step, click the Insert button and then the Movies and Sounds tab. This will take you to the option of where the movie comes from. Instead of clicking Movie From Clip Organizer, click the Movie From File. This will open an explorer that gives you the option to pick the video. Pick the one you want and it will immediately appear on the slide.
Once the video has been added, it might need a resize. Carefully slide the sizing handles that are in the corners of the video and they will resize. Once you are satisfied with where the size is, save the document and the video will be in the slide. Now move onto the next slide.
Create a Timeline in Powerpoint
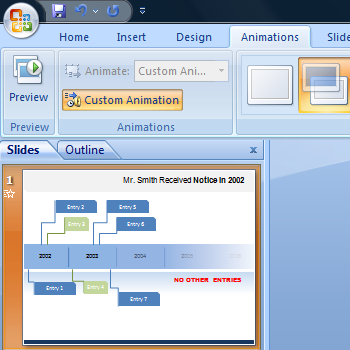
Project managers and other team members often need to create a graphical representation of a presentation. Such presentations often include specific milestones or events in a project or other endeavor. The classic time-line is usually depicted in a linear format or in tiered layers if there is a significant amount of information being displayed. A time-line can be created in PowerPoint by inserting a Microsoft SmartArt object on a plan slide and using the formatting tools and options to customize it.
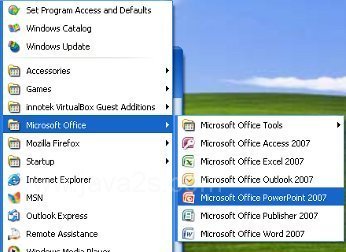
Step 1 – Open Microsoft PowerPoint by double clicking the program icon on the computer’s desktop or choosing from the “All Programs” sub-menu of the “Start” menu.
Step 2 – Create a new presentation by clicking the “File” and “New” menu options.
Step 3 – Input a title for the presentation by clicking the “Title” field and entering the appropriate label for the time-line presentation. Input a subtitle if amplifying information for the project’s heading.
Step 4 – Choose the “Theme Options” menu choice and select the “Slide Theme” menu option.
Step 5 – Select a color design for the PowerPoint presentation.
Step 6 – Insert a SmartArt button on a new slide by selecting the “Insert SmartArt Graphic” menu option located in the center of the blank slide.
Step 7 – Choose a SmartArt style that matches the overall presentation format.
Step 8 – Add milestones to the time-line by selecting the text placeholders.
Step 9 – Change the text format by selecting the “Formatting Palette” and then pick the desired font size and color.
Step 10 – Choose the “Insert Text Box” menu option and use the “Insert” menu option to add additional text labels to the time-line.
Step 11 – Save the PowerPoint file when the new PowerPoint time-line update is complete.


Comments - 3 Responses to “How to Use Powerpoint”
Sorry but comments are closed at this time.