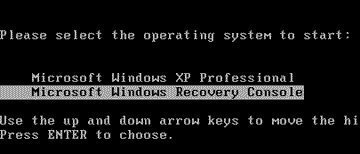
How to Use the Windows XP Recovery Console
The Windows XP Recovery Console can be used to repair problems which prevent a Windows XP system from booting.
Boot Windows XP from CD or Floppy
First, boot the computer from the Microsoft Windows XP CD. Before you start the process, go into your BIOS settings and ensure that your CD-ROM drive has the highest drive priority and not the disk drive or some other drive.
If you don’t have a Microsoft Windows XP CD, or if the computer you are working on does not have a CD drive, you can boot from a set of Windows XP Bootable disks. If you need a set of boot disks, read How to obtain Windows XP Setup boot disks.
Start the XP Recovery Console
When the system boots, you will be presented with a screen that gives you three choices:
This portion of the Setup program prepares Microsoft Windows XP to run on your computer: To setup Windows XP now, press ENTER. To repair a Windows XP installation using Recovery Console, press R. To quit Setup without installing Windows XP, press F3
Press the R key to start the Recovery Console.
Choose which Windows Installation to Repair
The next prompt will ask you which Windows installation you want to recover:
The Recovery Console provides system repair and recovery functionality. Type EXIT to quit the Recovery Console and restart the computer. 1: C:WINDOWS Which Windows Installation would you like to log on to (To cancel, press ENTER)?
Enter the Windows XP Administrator Password
When prompted, enter the Microsoft Windows XP Local Administrator password. If you do not know this password, read How can I recover a lost Windows XP Administrator Password?.
Recovery Console Commands
Once you are in the Recovery Console, you have a number of commands available to utilize to repair the system.
| Command | Purpose |
|---|---|
| Attrib | Changes the attributes of a file or directory |
| Batch | Executes the commands specified in the text file |
| Bootcfg | Boot file (boot.ini) configuration and recovery |
| CD / ChDir | Displays the name of the current directory or changes the current directory |
| Chkdsk | Checks a disk and displays a status report |
| Cls | Clears the screen |
| Copy | Copies a single file to another location |
| Del / Delete | Deletes one or more files |
| Dir | Displays a list of files and subdirectories in a directory |
| Disable | Disables a system service or a device driver |
| Diskpart | Manages partitions on your hard drives |
| Enable | Starts or enables a system service or a device driver |
| Exit | Exits the Recovery Console and restarts your computer |
| Expand | Extracts a file from a compressed file |
| Fixboot | Writes a new partition boot sector onto the specified partition |
| Fixmbr | Repairs the master boot record of the specified disk |
| Format | Formats a disk |
| Help | Displays a list of the commands you can use in the Recovery Console |
| Listsvc | Lists the services and drivers available on the computer |
| Logon | Logs on to a Windows installation |
| Map | Displays the drive letter mappings |
| MD / Mkdir | Creates a directory |
| More | Displays a text file |
| Net Use | Connects a network share to a drive letter |
| Ren / Rename | Renames a single file |
| RD / Rmdir | Deletes a directory |
| Set | Displays and sets environment variables |
| Systemroot | Sets the current directory to the systemroot directory |
| Type | Displays a text file. |


Comments - No Responses to “How to Use the Windows XP Recovery Console”
Sorry but comments are closed at this time.